Here are some of the important features:
- 300 MB disk space
- 10 GB Monthly transfer
- PHP with MySQL databases
- 5 Add-on domains
- 5 Sub domains
- PHP Flags manager
- FTP account
- File manager
- Webmail, POP3 email
- MYSQL, Php MyAdmin
How to install a script using an automatic script installer( Fantastico type installer)
Lets see how to install a script say wordpress( a famous blogging software). I will show you step by step procedure to install this blogging software. It is very essential if you are a
 blogging freak like me.
Step1: Login to 0fees from here with the username and password provided to you.
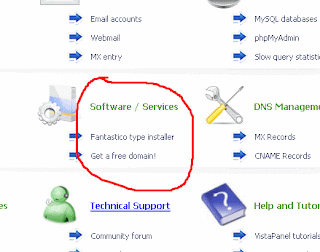
Step2: Now click on the Fantastico type installer which will be on the opening page(show in the image).
Step3: Choose your domain for installation and proceed.
Step4: Now choose the script which you wanna install, in our case it is WordPress 2.7 and click on Click to Install url.
Step5: Here we have to specify the destination, where we want to install our script. Default is root i.e our blog will open directly form www.sitename.0fees.net(leave with / to install to the root). If you are giving some name there for eg: /blog, then your blog will be opened from www.sitename.0fees.net/blog. It all depends on how you choose your destination.
Step6: It is almost done, we have installed the script in our server /. Now we have to setup our blog. For that open your site url in the browser. You will get to see the page requesting to create a configuration file for our blog. (See in the image) Click on Create a Configration File.

Step7: You will need to know
- Database name
- Database username
- Database password
- Database host
- Table prefix (if you want to run more than one WordPress in a single database).
For Database name I would suggest you to create a database with some name. If you don't know how to create then here are the quick steps, From home page click on Databases -> mysql database -> Give database name and Create database. I will be something like this fees0_2527122_blog [username_databasename]. Now back to the configuration, as we have everything else Let's Go!.
Step8: Fill all the
 fields. Remember Database Hostname is not localhost it is Mysql Host name. You can find all this information in the left bar of main page. Leave the last field as it is.
Step9: If all the fields are given appropriately it will let us to proceed further.
Step10: Give your blogtitle and email. That's it!! Our installation is completed it will provide us with the user-name and password, these are the login details of your blog.
Here is an example of my blog. http://gkc123.0fees.net/ . The best part is, you can do tons of things for FREE!!.
I hope you like the tutorial.
0fees has a kool service and a good news is that it is improving ... it supports curl ... ssl ... and has greater uptime than before ... nice tutorial btw :)
ReplyDelete@Asad
ReplyDeleteThanks :)
Hi nice to meet you, your profile reminds me of my college days at Nizam college.i still missed all those friendly Telugu people.i really like hyd/secbad..espicially Beef Biryani.btw one should try hyperwebenable.com ;-)
ReplyDelete@tc
ReplyDeleteThanks TC..I am pleased to hear that. I too enjoy Chicken Biryani particularly from Hyderabad house...n I am graduated from MJ college.
Hey buddy I have a domain in square brothers account .. how can I point it to 0fees.net ? What is the nameservers of 0fees ?
ReplyDeleteYou can try my new hosting at
ReplyDeletehttp://ayathullah.co.cc
NO ADS | NO POSTS Required
supports php and mysql